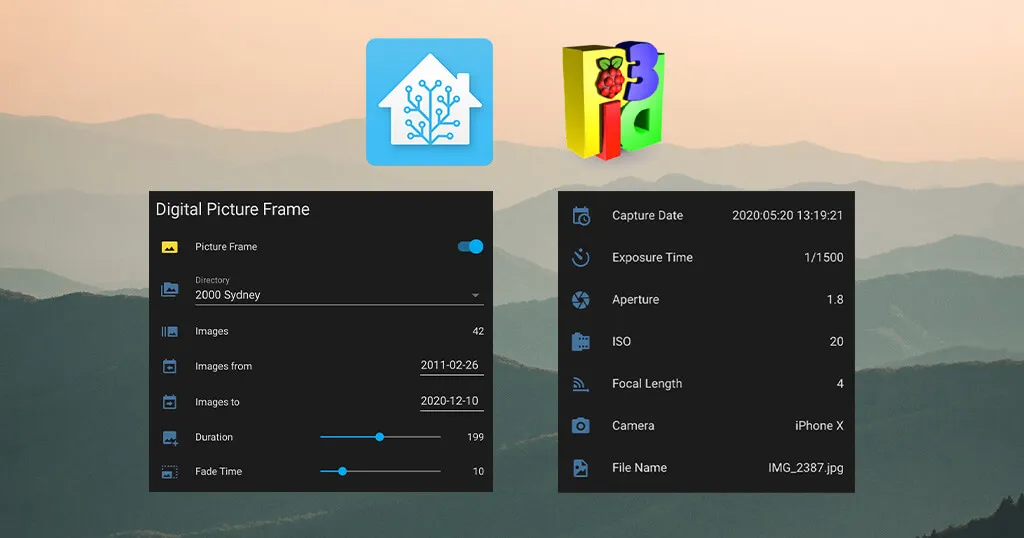
Sometimes you see a photo on your digital picture frame which you don’t like anymore, and you make a mental note to remove it when you get to your computer next time.
But often you just forget about it and then it comes up again. Wouldn’t it be nice to just say “Alexa, delete this image” instead?
Or you want to pause playback to enjoy a photo for longer or go back to the previous one. Now you can.
In this short article, I will show you how to do it with Pi3D PictureFrame as the image viewer software and Amazon Alexa in combination with Home Assistant as your humble voice servant.
Update, September 2026. Two things to know before you follow this. First, the MQTT topics below have been corrected: Pi3D PictureFrame publishes “back”, “next” and “delete” as Home Assistant buttons, not switches, so the topic is
homeassistant/button/picframe_delete/setand nothomeassistant/switch/…. Second, on a Pi 4 or Pi 5 running picframe3 you do not need any of the scripts below: the frame turns up in Home Assistant by itself, with a pause switch, previous and next buttons and a “remove current picture” button already there, and removed pictures land on a Removed tab in the frame’s own web interface with a “put it back” button next to each one. You still build the Alexa routine the same way — you just point it at those entities instead of writing scripts.
Pi3D PictureFrame and MQTT
You can set Pi3D PictureFrame, my favorite image viewer, to listen to MQTT messages to change certain parameters like display or fading delay and to set up smart filters for specifying a date range.
But what many probably don’t know is that you can also send direct commands like pausing the playback and deleting the currently displayed image.
The basic requirement is that you have an MQTT broker installed or are using a cloud-based MQTT broker.
As the installation of an MQTT on your Raspberry Pi is a matter of one single command, I recommend installing Mosquitto. In my experience, it is also much more reliable than an external service.
In the configuration.yaml, you just need to enable MQTT and specify the IP of your MQTT broker, which, with Mosquitto installed, is simply “localhost“.
mqtt:
  use_mqtt: True
  server: "localhost"
  port: 1883
Creating the scripts in Home Assistant
We are using Home Assistant as the bridge between Alexa and Pi3D. Unfortunately, it is not (yet) possible to send MQTT messages through Alexa directly, so we need this interface through Home Assistant and Nabu Casa. You can read all about it here.
One alternative is to use Node-RED. I wrote in 2020 that there was an issue with the then-latest Echo devices and that an update would follow; it never did, and the Node-RED Alexa add-on that article relies on is unmaintained and needs re-testing before I would recommend it. Home Assistant is still the route I would take.
Pausing the playback
Create a new script in Home Assistant, and call it “Frame Pause Playback”.
Under Sequence to the right, click on “Edit as YAML” (the button with the three dots) and paste this text in the box.
action: mqtt.publish
data:
  payload: 'ON'
  topic: homeassistant/switch/picframe_paused/set
Going to the previous image
Create a new script in Home Assistant, and call it “Frame Previous Image”.
Under Sequence to the right, click on “Edit as YAML” (the button with the three dots) and paste this text in the box.
action: mqtt.publish
data:
  payload: 'ON'
  topic: homeassistant/button/picframe_back/set
Deleting the currently playing image
Create a new script in Home Assistant, and call it “Frame Delete Image”.
Under Sequence to the right, click on “Edit as YAML” (the button with the three dots) and paste this text in the box.
action: mqtt.publish
data:
  payload: 'ON'
  topic: homeassistant/button/picframe_delete/set
(Two corrections in those three blocks, both made in September 2026. Home Assistant renamed service: to action: in version 2024.8 — on an older installation service: mqtt.publish still works. And “back” and “delete” are buttons in Pi3D PictureFrame, so their topics start with homeassistant/button/, while “paused” really is a switch.)
The delete command doesn’t actually delete your image.
It just moves it outside of its current location, to the folder named in the deleted_pictures setting of your configuration.yaml, and then moves to the next image in the playlist. That used to be /home/pi/DeletedPictures; since Raspberry Pi OS stopped creating a default “pi” user it will be under your own home directory.
This way, you can always recover any accidentally deleted images. (picframe3 goes a step further and keeps a journal of what it removed, when, and which folder it came from, so the Removed tab can put a picture back where it belongs.)
Testing the script
Test the script by manually triggering the three scripts. Check if your “deleted” photos are showing up in your deleted-pictures folder.
Connecting the Home Assistant scripts to Alexa
For a more detailed article on this subject, I recommend reading “Voice control your digital photo frame with Amazon Echo and Home Assistant“.
I assume that you have the Alexa app installed on your mobile phone. Let’s go through the steps:
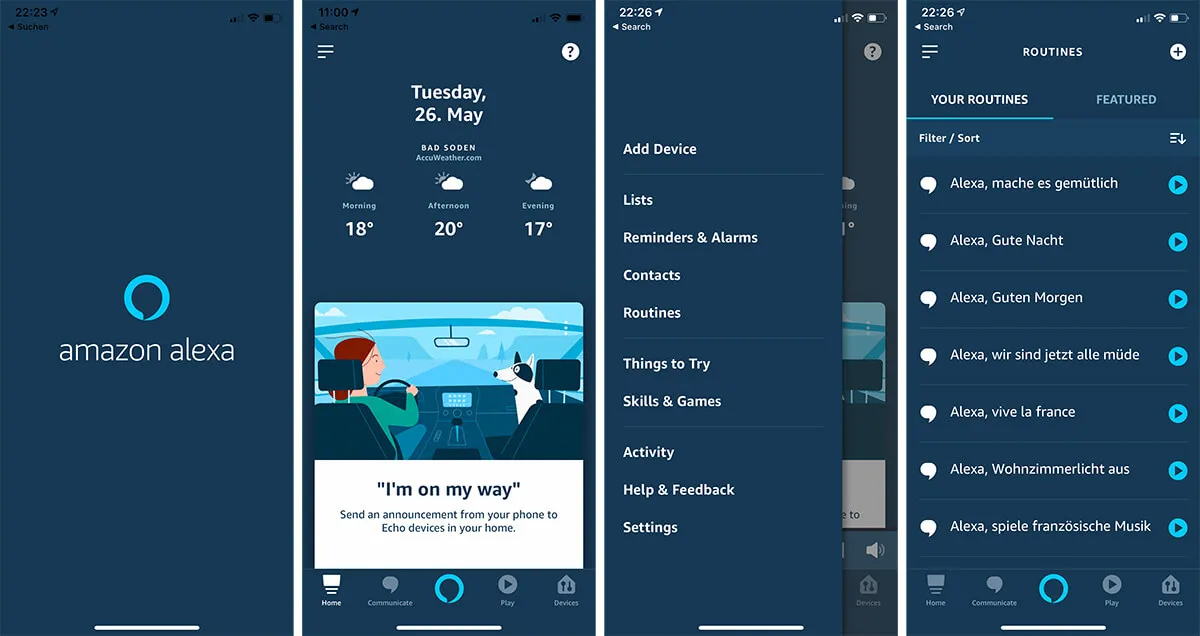
In the Alexa app, find “Routines” and create a new routine. (The screenshots below are from the 2020 Alexa app, which has been redesigned more than once since — the steps are the same, but the menu you reach them through has moved.)
Enter a routine name for your task, in this case, “Playback Pause”. Click on “When this happens” and choose “Voice”. Enter the Alexa trigger phrase in your language and click “Next” (The examples above are from another Routine, but you get how it works.)
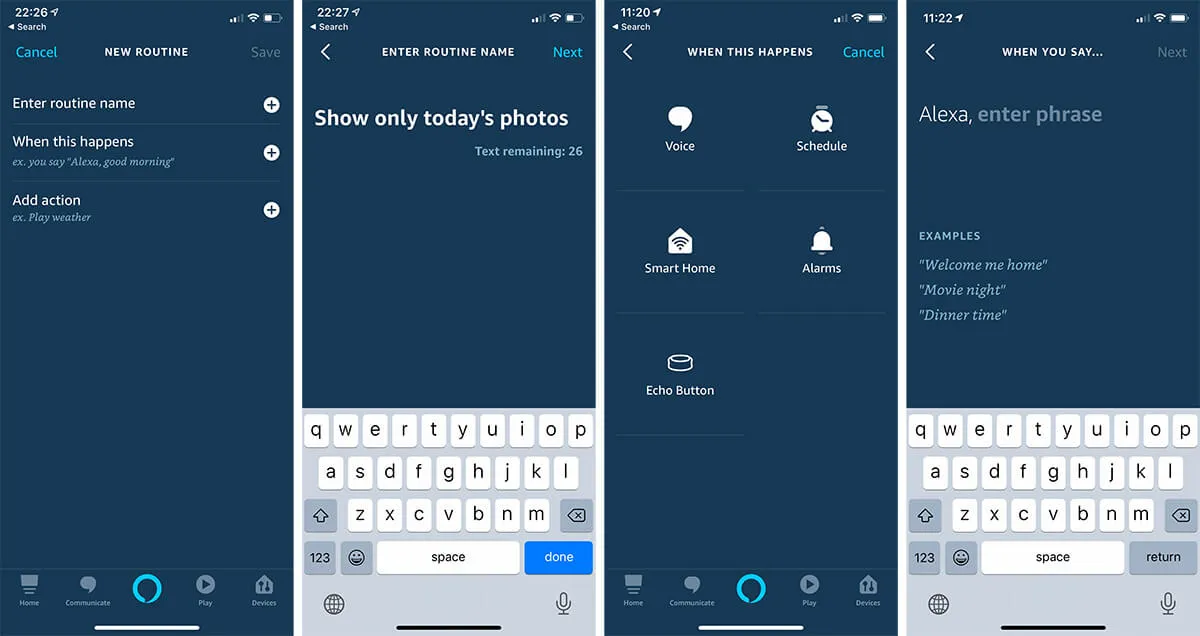
Click on “Add action” and choose “Smart Home” and “Control Scene”. What Alexa calls “Scene” is what is called a “Script” in Home Assistant. Choose the Scene/Script from Home Assistant and tap on “Add”. Finally, save your routine.
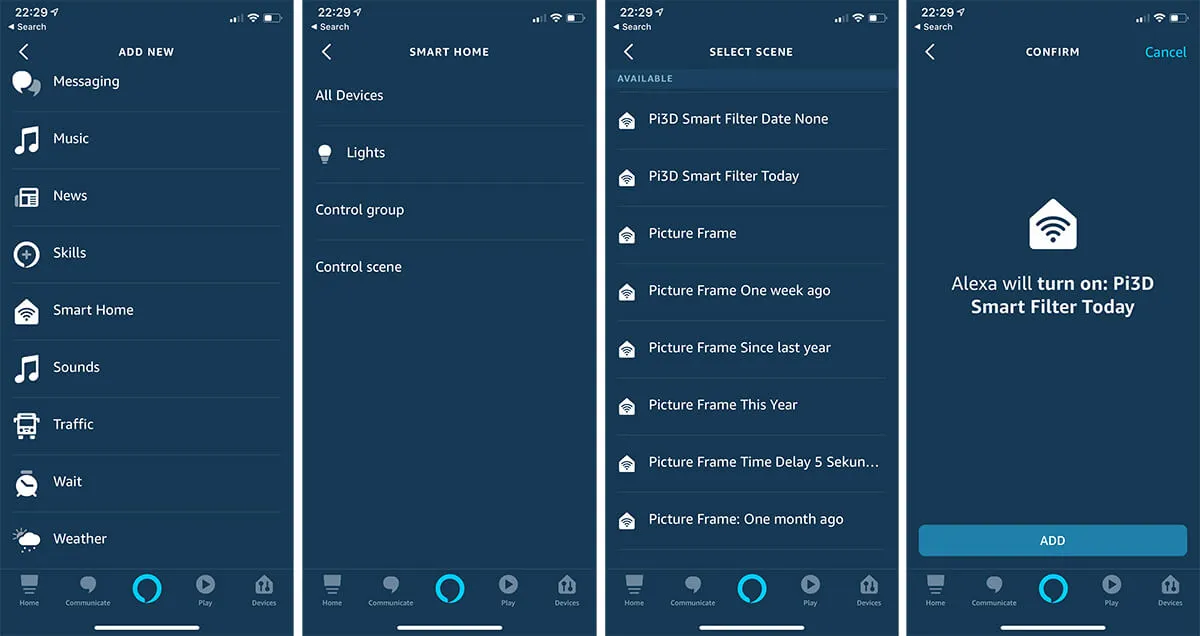
Wait a few seconds until the Amazon servers have digested your settings and test the routine by tapping on the “Play” sign on the right of your routine. Your command is now sent to Pi3D on your picture frame. If that works, the voice command will equally work.
Conclusion
Three simple commands that help you to operate your digital picture frame in the most convenient way possible – your voice.
Especially deleting images by voice as you see them has become a feature that we like to use frequently at home to cull those images that may have been nice at the time but are no longer. This way, you have nothing but beautiful memories, nature, or friends & family on your frame.
Is there another command that you would like to see? Let me know!
Was this article helpful?
Thank you for your support and motivation.